Level 6- England
The embossed on the back of Lancelot's shield leads to Cornwall, England, to a deserted King Arthur museum. Alistair thinks it uncanny coincidence, while Lara thinks that the next sword fragment is there.
Level Objective: Explored the ruins of the King Arthur museum for any sign of the fragment of Excalibur.
Rewards: 9 Bronze/ 5 Silver/ 1 Gold
Level Objective: Explored the ruins of the King Arthur museum for any sign of the fragment of Excalibur.
Rewards: 9 Bronze/ 5 Silver/ 1 Gold
WALKTHROUGH:
LOBBY WITH GIFT SHOP AND TICKET WINDOWS- 1 Bronze Reward
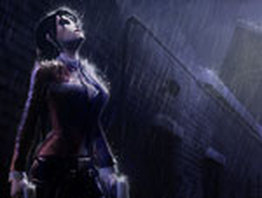
A short cutscene shows Lara, Zip, and Alister arriving on site at the deserted King Arthur museum. Lara climbs in through a hole in the roof and drops into the building's interior. To begin, throw your magnetic grapple to the loose vent above the Gift Shop sign. Pull it down. Inside the gift shop is a crate. Position it under the opened vent, and climb inside. Inside the room is a crate with a BRONZE REWARD. Grab it. Now throw your magnetic grapple at the vent in the wall between two wooden shelves and pull it out. You'll land outside in a wet alleyway.
ALLEYWAY W/ ELECTRIC BOX
Jump onto the third window, nearest the iron gate, and vault up to the ledge above. Shimmy to the left and drop down by the power box. Use the interact button to turn on the power. In the corner is a pipe. Climb up to the top, then jump to the right. Shimmy back above the third window nearest the iron gate. Drop below, then jump to the right, grabbing each of the windows. An unstable cord has created an electrical pool beneath you, so don't fall in. Jump to safety on the right, and then use the interact button to enter the building again. Exit the gift shop and enter through the two ticket booths. Approach the sword in the stone, and pull it using the interact button. The gate in front of you will raise.
ROOM W/ MOVING STATUES AND GAP IN THE FLOOR- 2 Bronze Rewards
Entering the room, walk to your right and face the narrow gap in the floor. You may need your PLS to locate the small gap in the wall across the narrow gap. Jump and crawl inside. Pick up the BRONZE REWARD. Exit through the hole in the wall, and once hanging on the ledge outside, backwards jump back to the floor. Walk onto the wooden plank that covers the gap in the ground. Jump to the first horizontal pole hanging in front of you. Swing to the second. It will spin and hit the wall, so quickly backwards jump onto the next horizontal pole before the pole you are on moves back into its initial position. I found that if you simply vault up and catch the pole on the way down, it will move back against the wall again, which will save you the trouble of having to jump back to the first pole. From the pole, swing to the drawbridge. As it is lowering, jump back to the pole, then swing over the lowered drawbridge. It will raise after a few seconds, so make haste. In the new room, shoot the latch on the King Arthur statue that leans at an angle. This will allow you to bridge the gap. On the right, near the display of Arthur fighting Mordred is a vent that sites at the base of the wall. Crawl through and claim a BRONZE REWARD. Outside, pull the second sword from the stone. This reveals the mechanism that will open the next door. Use the magnetic grapple to pull the weight near the door down as far as it will go before running and rolling through.
WAREHOUSE W/ FORKLIFT- 1 Silver Reward
You'll find yourself inside a warehouse. First, we'll go after a reward. Climb into the forklift. On the right side of the room, high on the wall, is a vent. Before or after you use the forklift you can pull this vent out. Using the forklift, stack two crates to be able to reach the vent opening. Once you have done these, jump on top of the crates and enter the room to learn a bit about Professor Worth and collect a SILVER REWARD.
FAKE KING ARTHUR'S TOMB- 1 Silver Reward
Drive the forklift past the wall of crates, some of which you may need to move, and down into the cenotaph, or fake tomb. Drive the forklift into the sarcophagus to reveal a SILVER REWARD. On the left side of the room (Lara's back is facing the entrance), ram the forklift into the wall to reveal the hallway leading to the real tomb. If you have difficulty finding the right spot, use the binocular RAD mode. There are two crates blocking the path though, so you will have to move them to proceed.
HALLWAY WITH SPEARS AND IRON GATE
Following along the hall, crash your forklift into all of the spears. You will have to return here later, and you won't have the forklift. You'll come across a gate. Ram the forklift into the gate, and raise it as far up as it will go. Pass through and destroy the next wall of spears. At the end of the hall is another breakable wall. Destroy it to trigger and interactive cutscene. You'll only need to press the jump button for this.
TALL CHAMBER W/ COLLAPSING STAIRCASE- 3 Bronze Rewards
From the beginning platform, there are two bronze rewards that you can pick up here. On the right side of the hall, in an unreachable hollow, throw your magnetic grapple and collect the first BRONZE REWARD. On the opposite side of the hall from you, throw your grapple to another BRONZE REWARD hidden in another hollow. Climb down the broken stairs. On the left is a ledge, from the ledge, jump to the ledge to its right. This ledge will begin to collapse. Quickly shimmy to the right, and drop to the platform below. The platform will begin to collapse. Run down the broken steps and jump to the next set of collapsed stairs. From the bottom of the stairs, jump to the pole and swing to the hollow in the wall. From the hollow, drop to the ledge, jump to the ledge on the right, and shimmy to the right along the ledge which will soon collapse. To claim the BRONZE REWARD, shimmy fast to the far right, and jump into the small hollow near the corner. Inside is the reward. Claim it, then drop to the stairs below. At the bottom of the stairs, jump to the rope. You can either jump directly to the next set of stairs, which are collapsible, or traverse the ledges, collapsible as well, on the side wall. Once at the stairs, jump to the next set, the ground floor closer to you. Grab the ledge on the wall, shimmy around the corner, drop down the two ledges, then onto the slope of rubble beneath. You've made it to the ground floor.
HALLWAY W/ BURNING PIT AND ROWS OF BURNERS
Enter the hallway and follow it to the burning pit. Jump over the pit and land on the other side. Turn right and you'll notice the rows of burners on the floor. Using the magnetic grapple, pull the crate across the way towards you. Position it so that it sits on top of the first burner, which alternates between on and off. Jump to the middle burner just after it turns off, and then finally, across the last burner and into the safe zone. Pull the crate towards you as you will need it for this next sequence. Again, position it on the first burner, and jump across to the middle burner, which alternates, and into the safe zone. Pull the crate again, via magnetic grapple, and push it against the wall with the high ledge. Climb to the high ledge, jump onto the other side, and pull the nearby lever to open the gate.
HALL W/ ROTATING BLADES AND CRATES- 1 Silver Reward
On the right side of the chamber, inside the small space with the crate, dodge roll past the blades, inside, and collect the crate. Pull it through the blades and into the central chamber again. You may want to push it under, walk onto the other side, and then pull it out to avoid the risk of losing health to the blades again. You should now have two blocks, the one just outside the gate you raised, and the one from the space behind the blades. On the left side of the room is another space containing a SILVER REWARD. Using the above method to bypass the blades, collect it, and then retreat back into the central chamber. You can also just roll through the blades. You'll lose some health, but you can make it in and out without dying. Now bring the crates through the blades opposite the gate you opened with the lever. Directly across this chamber, pull the two crates through the spinning blades again. Pushing one against the other, you'll make a path across these burners, and you can jump to safety on the other side. Pulling the lever in this area will deactivate the burners. The lever also opens the nearby stone door. You can jam this door with a crate, in case you'd like to backtrack at any point. To do so, pull the lever, having the crate already pushed up against the door, then when the door is open, push the crate in as far as it will go. The door will be left open enough for you to crawl through.
SUBMERGED CATACOMBS W/ WEIGHT AND MOVABLE COFFINS- 1 Bronze Reward
Follow the hall on the other side of the door down into a chamber with a pressure pad on the floor. The gate will close behind you. From the left side of the entrance, there is an entrance to a catacomb with a submerged floor. Swing along the hall and jump up onto the stone platform. Using the chandelier, crash it into the high, barred hollow by using the magnetic grapple. Use the magnetic grapple to collect the BRONZE REWARD. Hanging over the water is another chandelier. Crash this one into the barred hollow on the other side of the water. Pull the coffin out of the hollow and onto the water's surface. Jump onto the coffin, and using the magnetic grapple to attach to the mounted torches along the watered hall, pull yourself back into the room with the pressure pad on the floor. The coffin will only go to the edge of the pressure pad, so step on the pressure pads opposite side, and use the magnetic grapple to pull it on. This will open the gate down this hall. Pass through the gate. You'll notice the area beginning to become more cavernous.
SUBMERGED CATACOMB HALLWAYS W/ COFFINS- 1 Bronze Reward/ 1 Silver Reward
From the entrance into the first flooded hallway, drop into the water and swim back towards the direction of the entrance into a small space that contains a BRONZE REWARD under the surface of the water. To continue, pull the lever in the water to open the gate. Quickly swim towards the coffin to "hitch a ride". The coffin will be following along a current. As it wafts through the water, jump to the ledge about halfway down the hallway, on the right, and into the next hallway. Swim down the hall, make two lefts, and then pull the lever on the right wall. This opens the gate where the coffin will come through. Jump on, and we'll make a small side trip to collect another reward. As the coffin heads towards the hallway you swam out of, pull yourself (remember with the magnetic grapple) towards the hollow with the SILVER REWARD. Collect the reward, then return to the hallway with the lever. Jump to the ledge opposite the hall with the silver reward, and a short sequence will show Lara being thrust off a small waterfall and into a cavernous chamber.
CAVERNOUS CHAMBER W/ BELLS AND TOMB- 1 Silver Reward
Once you swim to the rocky platform, you'll find yourself in front of King Arthur's tomb. The next goal here is to get inside and do some raiding. Before we begin some acrobats, pull the two poles with the suspended bowls of fire such that the one on the left side of the tomb (while Lara is facing the tomb), is parallel to the front door, and the second one on the right is perpendicular. Now continue towards the right side of the tomb. Climb the ledges on the far left and climb onto the raised platform. From the platform, swing to the slope. At the bottom, jump towards the pole with the bole of fire which will rotate. Swing and jump, throwing your grapple at the same time and swing to the second pole. This will rotate as well. Jump and climb the narrow walkway up to the wall with the ledges. Traverse the ledges, jumping onto the chain. Climb the chain up to the roof of the tomb and locate the SILVER REWARD hidden behind some rock formations. Approach the dome in the center of the rooftop, jump to the rope, and descend into King Arthur's tomb.
King Arthur's Tomb
A cutscene ensues showing Lara examining King Arthur's tomb. She realizes how very real King Arthur is and was, and how swords and stones are all part of the monomyth that ties together tall the different legends of great kings and the mysterious dais'. Lara comes to believe that everywhere the crusaders went, they raised up these kings to "reshape the course of human destiny". Lara becomes curious about King Arthur's final resting place, somewhere known as Avalon. Once you regain control of Lara, locate the coffin labeled 'BEDWYR' (after Bedivere). A cutscene shows that several crusaders, who are missing from their tombs, left a piece of the sword with Arthur so that he could use it to leave the tomb when the time came. Pull out the coffin of Bedivere and drag it across the chamber to the broken column near the suspended weight. Push it up against the broken pillar. Before you climb up, pull the chandelier above towards the bell near the entrance. Once it is swinging in that direction, you have a short time to act. Jump onto the pillar and consecutively to the suspended weight. The bell will rise and the chandelier will crash into it causing a resounding chime and a cutscene in which the high-frequency sound causes the golden casket of King Arthur to break open. Lara retrieves the sword fragment from his casket, reluctant to take it from his resting place. Lara then hears that Zip and Alister are being attacked back up top. The main doors to the tomb are now open. Exit the tomb. Once you are far enough out, a cutscene shows a vicious sea monster rising from the depths.
CAVERNOUS CHAMBER W/ BELLS AND TOMB (BOSS SEQUENCE)
The sea monster wan be taken out with the mechanisms around the cavern. Four spike-cages are suspended above the water. The goal is to shoot the bells near their corresponding spike-cages so the sea monster examines the noise, then you through your grapple to pull the switch that will send the cage down onto his head. Their are four sets of these mechanisms, and they will work until they are used, then you will have to find a new one to lure the beast to. Avoid his lunges for you and his acidic spit. He will also simply throw his body at you if you spend too much time in one area. So if you are unsuccessful in hitting him with a cage, retreat to a new location. The back two mechanisms can only be accessed from the broken bridge. Once you defeat him, his dead corpse will float to the surface on the other side of the chamber. You'll have to swim towards it, now. Jump up onto the platform with one of the mechanisms, then onto the sea monster's back. Around his head, jump to the ledge and then the platform above. Follow the tunnel out of the cavernous chamber.
INTERACTIVE CUTSCENE
Use your grapple to swing across the hallway gap. From here, jump to the pole and swing to the rocky slope. Jumping over the gap halfway down the slope will initiate a cutscene. You will need to press three buttons which vary upon system.
RETURNING TO THE CHAMBER WITH BLADES- 1 Bronze Reward/ 1 Gold Reward
From the enclosed space, shoot the latch holding the rope in place. Climb up on either of the two shields on the gate. Once here, swing into the caged-in area for a BRONZE REWARD. Climb back up to the rope, via the gate, and turn around and swing to the high ledge with the lever. Pull the lever to open the door. Continue down the slope and back into the chamber with the blades. Two mercenaries will greet you at the bottom of the slope, and then retreat back into the central room with the blades. Once you dispatch those two and enter the central room, another mercenary will come out from hiding, and one will shoot you from the high ledge.
GOLD REWARD CHALLENGE
In the central room with the blades, there are two ledges on opposite sides of the room with stone panels labeled with Roman numerals 'I' and 'II'. Push these blocks in, beginning with 'I' then secondly 'II'. Backtrack towards the entrance to the tomb with the crumbling staircase. Two mercenaries will wait for you by the rows of burners, and if you're lucky step into them in the process. You can easily jump over all the burners now that you've pulled the lever. On the other side of the room with the pit of fire, a mercenary will shoot you from the other side. Kill him, and then proceed. Once you are inside the chamber with the crumbling staircase, kill the nearby mercenary, then press the panel in on the wall labeled, 'III'. Doing so will open a secret hollow in the wall nearby containing the GOLD REWARD.
ASCENDING THE CHAMBER W/ THE CRUMBLING STAIRCASE
A metal platform is suspended from the ceiling. Grab onto it, and then use your interact button to press the switch that will begin your ascension back up to the surface. Once at the top, kill the mercenary, and then jump from the platform to the top set of crumbling stairs. Use the magnetic grapple on the coffin in the barred hollow to pull yourself to the stairs. Continue up into the hallway.
RETURNING TO THE WAREHOUSE
Continue down the hallway, but be weary of the dog and mercenary. On the other side of the nearby gate, another dog will attack you. Kill him, then continue around the corner where a mercenary lurks behind a crate. Proceed back into the Fake King Arthur's Tomb, killing the two shielded mercenaries, and then back up into the warehouse. Two mercenaries wait at the top, Jake and Morgan. Once you kill them, a cutscene shows Lara taking out the man holding Zip and Alister hostage outside. Lara says that it is time to go home.
Last Level: Level 5- Kazakhstan Next Level: Level 7- Nepal
