Level 7- Nepal
Lara has finally found all of the pieces of Excalibur. Unfortunately, they cannot be reunited without the mysterious Ghalali Key, an artifact which Lara understands was given to her mother years before, and may lay in the wreckage of her plane in Nepal. She needs only the final piece of the puzzle to finish her father's work and discover what really happened to her mother.
Level Objective: Obtain the Ghalali Key
Rewards: 9 Bronze/ 6 Silver/ 1 Gold
Level Objective: Obtain the Ghalali Key
Rewards: 9 Bronze/ 6 Silver/ 1 Gold
WALKTHROUGH:
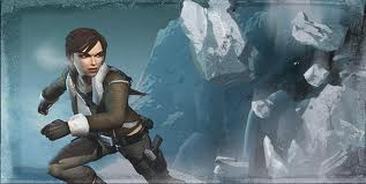
A cutscene shows everyone at Croft Manor examining the pieces of Excalibur. But they cannot put them together without the Ghalali Key. Lara realizes that it lays in the wreckage of her plane. Winston then approaches Lara to send a gentle warning to be careful with the sword. The next cutscene shows Lara in Nepal, on a snowy, ruined cliff side.
CLIFF SIDE RUINS W/ LEDGES AND CRUMBLING PLATFORMS- 1 Bronze Reward/ 1 Silver Reward
Grab the ledge and shimmy as far left as you can go. As long as you shimmy at a constant rate, the ledge will not crumble onto you. Climb up the ledge, and then slide down the slope, jumping to grab the next platform. Jump to the next platform, and drop down onto the lower ledge. Shimmy as far as you can around the corner, and then perform a backwards jump to grab a piece of crumbling wall. Quickly shimmy to the right. Climb up the ledges. The slanted, decrepit platform will break into two pieces. Jump onto the pole which, too, will break. Swing to the ledge. Jump to the top of the square, ruined pillar. Drop down to the ledge opposite the one you climbed up and retrieve the BRONZE REWARD. Facing the icicles hanging from the snowy cliff, jump and throw your grapple at the bell suspended above. Swing to the icicles. These will snap off, so make haste in turning around each one and jumping to the next. Jump to the snowy ledge. Vault up the highest ledge, and instead of climbing atop the snowy platform, shimmy around to the right to the alcove with the SILVER REWARD.
SNOWY TOP AND SLOPES AND CRASH SITE- 1 Bronze Reward/ 2 Silver Rewards
Shoot the cracked ice wall and follow the icy hall to the ledge overlooking the crash site. Jump to the pillar on the right. Slide down the slope, and then jump to the next. Jump to the pillar. From the first pillar, jump to the second, which will begin to crumble, and then to the makeshift horizontal pole. The pole will not break, so you can take your time with it. Jump and throw your magnetic grapple, swinging into the snowy alcove. From here, locate the breakable spot on the icy wall. Shoot it open, and then take a running jump to grab the platform and claim a SILVER REWARD. From this point, jump back to the snowy alcove. Follow the path out to a ledge, and jump to the broken wing of the plane. Climb down to the lowest ledge on the wing, and then perform a backwards jump to the snowy ice shelf behind you. Drop to the next ledge, and then to the ground. Near the suspended propeller is a BRONZE REWARD hidden behind some debris. Collect it with the magnetic grapple, and then look at the piece of bulky debris lying nearby. Using the grapple, pull it to the edge of the snowy platform. Proceed to the ground where a snow leopard awaits you. Dispatch it, and then pull the bulky debris you just moved to the edge, off the high platform and onto your level. The goal here is to weigh down the plane so it doesn't tip over the cliff. Before you continue, on the right side of the plane is a ledge that oversees a gap. On the other side is some debris. Use the grapple to pull them away, making a clear path to jump to the other side and collect a SILVER REWARD. Now once the plane is weighed down with the bulky debris, by standing inside and using your grapple to pull them in, walk inside to trigger and interactive cutscene.
INTERACTIVE CUTSCENE
You'll need to press four buttons to survive the plane as it slides off the cliff from your weight. A cutscene shows Lara examining the Ghalali Key. She then uses her binoculars to spot the temple near the crash site. This foreshadows the next location you are headed to. From the crash site, jump to the first icy slope and slide to the breakable pole. Swing within two rotations to the next icy slope, and then jump to the next slope. You'll need to jump almost immediately, here. As you jump again, use your environmental hazards button to shoot open the icy wall. Jump inside to another slope, jumping consecutively to another breakable pole, landing inside an icy chasm.
ICY CHASM- 2 Bronze Rewards/ 1 Gold Reward
Inside the first room, turn to face the ruined wall, and throw your grapple to collect a BRONZE REWARD. Continue into the next room. Jump to the ledge, and then to the pole. Swing from the pole to the ledge, and then jump to the next ledge, which will begin to collapse. Perform a backwards jump and swing to the icicle. From here, either jump directly onto the balancing snow platform, or onto the next icicle, and then to the platform. Once on the platform, stand in the center, and locate the BRONZE REWARD in the hollow on the wall. Use your magnetic grapple to collect it. One you have it, quickly run across its surface and jump to grab the ledge on the icy wall. Shimmy until you can reach the platform, and then vault up onto it.
GOLD REWARD CHALLENGE
From the platform, drop to the ledge, shimmy to the left, drop to the ledge below, drop down two ledges, shimmy again to the left, and then jump into the hollow with the GOLD REWARD. Return to the first ledge, the way you came. Once on the ledge, jump to the high ledge on the left. Jump to the right and grab the ledge on the wall. Drop to the ledge below that. Shimmy to the left and then jump backwards onto the crafted pole. Climb up the pole, and then jump to the ledge on the right. Now from this ledge, jump across the chasm to the crumbling ledge. Hurry, and shimmy to the right. Once to the right, vault up the the ledge above. Follow the short passage out of the chasm and into the battle zone.
BATTLE W/ RUTLAND'S MERCENARIES- 2 Bronze Rewards/ 1 Silver Reward
Head outside and fight the eight mercenaries. Two are on high platforms, so be on the lookout! Once you've dispatched them, find the small stream of water. Facing the water, but not jumping in, follow it to a blind spot on the left side and pick up the hidden BRONZE REWARD. Climb atop the smallest ledge and use the binocular RAD mode to locate the thin wall of ice. Shoot it, and then jump inside to grab a SILVER REWARD. Now climb the other ledges to the high platform where the one mercenary lurked. Pick up the BRONZE REWARD. Using your magnetic grapple, swing across the gap to the ruined platform. Jump up to the zip line and swing over the field, and the icy water, to the high platform on the other side.
SLOPE AND ICY TUNNELS W/ WATER AND FLOATING ICE- 1 Bronze Reward/ 1 Silver Reward
Proceed down the slope, and step across the translucent, icy ground. Just on the other side of the ice, turn left and notice the BRONZE REWARD tucked away in the tiny alcove. Collect it, then begin to progress further into the tunnel. When you arrive at the pool of icy water, jump out onto the first piece of floating ice. On the second piece of floating ice, shoot down the large block of ice overhead. This will allow you to continue without getting wet. Jump to the ledge overlooking the stream of icy water and more floating chunks of ice. You'll want to jump along the slabs of ice, heading the way they are floating down the stream, so against the current. Before jumping to the obvious ledge on the right, jump to the platform on the left and collect a SILVER REWARD. Now use the slabs of ice to jump across the stream again, and up into the next small tunnel. You'll notice the temple entrance, here.
TEMPLE CHAMBER W/ COLLAPSED FLOOR AND SUSPENDED BELLS- 2 Bronze Rewards/ 1 Silver Reward
Enter the temple by heading up the stairs. Kill the snow leopard that awaits you here. This is the last chamber before the end of the level. Take the stairs on the right, and immediately on the right wall, shoot the center panel to reveal a SILVER REWARD. Return up to the top of the stairs. Jump out and use your magnetic grapple on one of the suspended bells. Swing from bell to bell, landing atop the small square platform on the opposite side of the room. From this vantage point, you can shoot the snow leopard below, before continuing. A weight puzzle is at hand. Before dealing with this, though, take the hall above the stairs on your left to find a BRONZE REWARD. Do the same for the stairs on the right to collect another BRONZE REWARD. The goal of the weight puzzle is to get the largest box onto the pressure plate up top. Once you do, the doors will open. Enter the ruins, a sequence showing the doors closing behind you. Once inside the main chamber, a cutscene will ensue. Lara uses the Ghalali Key to reassemble Excalibur. Lara tries to activate the mechanism that claimed her mother all those years ago, but is unsuccessful because the dais is broken. Excalibur is now a usable weapon. Enter the side hallway and use Excalibur to break down the door. Once you proceed through the door, the floor will begin to collapse even more. Jump from ruined pillar to ruined pillar until you are on the one that faces the stairs. The pillar will begin to lean towards the broken platform with a door, so jump when ready and grab the ledge. Once you do, the final cutscene will show Lara exiting the ruins, already making plans to revisit Bolivia. That is the end of the level.
Previous Level: Level 6- England Next Level: Level 8- Bolivia Redux
