Level 3- The Lost Valley
Having made it through the lost city of Vilcabamba, Lara stumbles into a massive chamber housing an underground waterfall. She knows that the Tomb of Qualopec lies hidden behind the waterfall, but she cannot surpass its mighty fall. The only way she can shut it off is by traveling into the Lost Valley, and recovering the cogs to a machine that will stop the flow of water.
Level Objective: Travel into the Lost Valley and recover the three cogs that will activate the machine that can stop the waterfall from flowing.
Artifacts: 2
Relics: 1
Level Objective: Travel into the Lost Valley and recover the three cogs that will activate the machine that can stop the waterfall from flowing.
Artifacts: 2
Relics: 1
UNDERGROUND WATERFALL (BEGINNING OF LEVEL) - 1 Cog/ 1 Small Medipack/ Shotgun Ammo
Exit the hall onto the platform overlooking the underground chamber. On the right, cave wall is a series of gears that control the stopper for the waterfall. Two wolves will greet you from below, friendly as always. After you've unleashed your wrath, dive into the pool of water and follow the submerged tunnel back into a small air pocket where you can pick up one SMALL MEDIPACK. Once you've surfaced, grab the Cog at the base of the rocky incline nearby. Proceed up the incline, jump to the ledge, vault up several ledges and collect some SHOTGUN AMMO. Jump to the higher ledge, and then jump over the gap, to the right, shimmying around the ledge, and vaulting up the remaining ledges to the area above the waterfall.
RIVER ABOVE THE WATERFALL - 1 Large Medipack/ Shotgun/ Second Cog
Atop the waterfall is a river, which will propel you, against your will, off the precipitous edge of the waterfall. The climb up was a bit nasty, so you'll find it's best to avoid falling in the river. Follow the path up to the broken bridge. Jump from one side of the river to the other. Climb up two ledges and backwards jump onto a wooden platform. From the platform, use the manual aim command to shoot the rope structure across the way with two ropes that are entangled together. Shoot the intersection point (where they cross), which will make a horizontal pole accessible. Grab the ledge, shimmy around the corner, backwards jump to the horizontal pole, and swing to the other side of the river. Once you've made it up the rocky path, jump off the stone ledge and throw your grappling hook at the ring fixed into the ceiling. Swing to the wooden crossing that is built over the gap above the river. Climb up the ledges and pass through a small, stone room which opens out to a wooden bridge. First, grab the SECOND COG on the platform across the bridge. Now use your manual aim command to to shoot the ring suspending the wooden bridge. Shoot the bats that approach from the air.
Optional Secret: Throw your grapple at the revealed ring, and slide down to the farthest point you can, swinging, and jumping towards the small hole in the rocks to the right of the fallen bridge. Lara will crouch automatically. Follow the tunnel to a hole behind the waterfall where you can pick up one LARGE MEDIPACK and the SHOTGUN. Yeah! Now you can really shoot things! If you decided to collect the Optional Secret, you will have to fall into the river before returning back to the platform where you just picked up the second cog. If you do, you will have to fight three wolves that attack, even more savage than the first group!
Back on the platform where you collected the second cog, grab the pole fixed into the spinning cog. Swing to the small support beam on the waterfall. Shimmy and vault to the highest ledge, and then perform a backwards jump to the ledge revealing a tunnel. Pull the switch at the end of the tunnel which will open the gate to the relic later on. See the 'Relic Challenge' section to hunt it down. Dropping into the river is now the easiest way to proceed through the level, instead of climbing the ledges down to the bottom.
UNDERGROUND WATERFALL (AFTER YOU'VE COLLECTED THE 2 COGS)
Once you've made it back down into the initial waterfall chamber, jump out of the water and defeat the two wolves that attack from nearby. Locate the ladder that scales up to the high, wooden platforms.
First, place a cog on the peg that protrudes from the wall on the right side of the switch. Pull the switch, and a sequence shows the peg moving the gear up to meet the other gears, activating the next few gears. A horizontal pole, stuck into the face of one of the now-active gears, swings above you. Grab it, and at the right time, swing to the pole on the larger gear, and consecutively, to the ladder leading up to the next platform.
Again, stick the cog into the peg, and pull the switch. A sequence shows the next few gears activating. Traverse the ledges on the right side of the switch, and perform a backwards jump onto another wooden platform. From this platform, you'll first notice the wooden board that spins on the nearby gear. This will take you to the final switch and peg, but since we don't have any pegs, we'll have to find the one hidden in the lost valley.
Make the jump to the ledge on the rocky wall. Shimmy to the right, vault up, and go as far to the right as you can. Now do a backwards jump to the rope dangling behind you. Slide as far down the rope as you can, and then swing to the ledge on the stone wall to the right of the ledges you just climbed. Shimmy around the corner, and jump to grab the wooden beam above the noticeable, tunnel entrance. Dropping onto the platform will force the ladder nearby to fall over. The boards will break off, but a horizontal pole will now allow you a shortcut so you don't have to climb up the wooden platforms all over again.
TUNNELS W/ BEAR, SLOPE, AND HIGH LEDGES - 50 Caliber Ammo/ 1 Artifact
Vault onto the rock wall, and pull yourself up. Lara will automatically crouch. Drop to the other side of the small crawlspace, and proceed through the tunnel. Once you come to the second crawlspace (the first being the one you entered the tunnel through), be prepared to kill one of those nasty bears. They may be able to climb trees, but there are no trees here! If you run and climb onto the wooden platform as soon as you enter the cave with the ledges and wooden platforms, the bear will come after you, but not be able to reach you. Choose a good vantage point from which to shoot the beast...or just take him head on! Once he's down, climb the ledges to the highest, wooden platform and pick up the 50 CALIBER AMMO.
An artifact is hidden nearby. Facing the wooden slope across the gap, from where you picked up the ammunition, face the long, narrow slope on the left, considerably lower than you. Jump straight forward, perpendicular to the platform's left edge, and almost as soon as you hit the slope, jump and grab the edge on the tall, stone and wooden structure you were just atop. Shimmy around the corner, and backwards jump into the hole in the wall containing the first ARTIFACT in the level.
Once you've collected the artifact, backtrack to the platform with the pistol ammunition. Jump to the vertical pole, and position Lara so she can jump backwards onto the stone ledge behind her. Once she's caught the ledge, shimmy to the right, and vault to the higher ledge. Now jump backwards onto the same, vertical pole. Chimney-jump to the next pole, and then to the opening into the next chamber. Slide down the slope, and proceed through the tunnels, ignoring the wooden poles, for now, and into the next chamber.
CHAMBER W/ SLOPING SURFACES AND DEADLY PIT - 2 Shotgun Ammos
In the next chamber, pick up the SHOTGUN AMMO at the top of short set of stairs. Walk onto the wooden ledge opening to the pit with the sloped surfaces and deep pit. Take a running jump to the first slope, and at the base of the surface, jump to the ledge on the opposite wall. Jump to the right onto the platform with the SHOTGUN AMMO. Jump to the horizontal pole, swing to the ledge, and vault up the ledges to the above platform.
RUINED HALL W/ LEDGES, BATS, AND STONE PLATFORM - 1 Large Medipack
In the next hall with the beckoning, deep pit, jump to the ledge on the nearby wall. Shimmy to the far left until Lara can support her feet to perform a backwards jump. Once you grab the opposite ledge, shimmy to the platform and pick up the LARGE MEDIPACK. Watch out for the incoming, two bats. Continue to the small hole in the wall, climb in so that Lara is in a crouching position, and begin traversing the mossy tunnel. You'll notice the transformation from decrepit ruins to prehistoric tunnel. You'll come to a narrow section of the tunnel, now, with wooden planks covering a hidden slope. Take the plunge through the wooden boards onto the mossy slope, and enter the Lost Valley.
LOST VALLEY FLOOR AND INTERACTIVE CUTSCENE
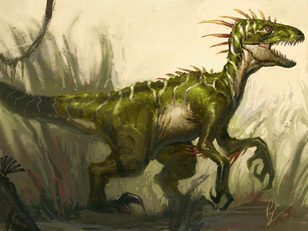
Welcome to the Lost Valley. Your welcoming committee? Three velociraptors will attack you from nearby, not giving you a chance to take in the breathtaking scenery. Once you dispatch these three, which is easier with the shotgun, three more will attack. Once all six raptors are down, an interactive cutscene ensues in which a group of raptors run in terror from a tyrannosaurus. The old T-Rex is back, and nastier than ever. Good thing we can't smell his breath from our monitors and television screens! First you'll have to press the dodge roll button, followed by the shooting button, followed by the jump button. Once you've survived the interactive cutscene, you begin the Peru Boss Battle!
T-REX BOSS BATTLE
Congratulations, your presence in the Lost Valley has just "ticked" off the T-Rex. Read the bullets below to fight His prehistoric ugliness.
LOST VALLEY TEMPLE - (2) 50 Caliber Ammo/ 1 Small Medipack/ 1 Cog
There are a lot of items for Lara to pick up around the area, so before entering the temple, first pick up the 50 CALIBER AMMO near the little cliff that Lara cannot climb, from which she jumped in. Pick up another 50 CALIBER AMMO in the bushes near the right side of the little cliff (when Lara is facing the cliff). Now pick up the SMALL MEDIPACK by the T-Rex's left foot.
To climb into the temple, jump on the slanted blocks by the T-Rex's right foot, and jump onto the stone porch of the temple. Enter the temple, and pick up the third and final COG on the platform in the center of the pool of water. Now jump into the water and enter the tunnel on the right side of the chamber (when Lara's back is facing the temple entrance. At the end of the submerged tunnel. turn right and ascend to the surface.
TALL ROOM W/ POLE AND LEDGES
Climb onto the stone floor, and then jump onto the pole. Climb to the top of the vertical pole, and jump onto the semicircle platform. Vault up the ledges nearby, shimmy and jump to the left, and then perform a backwards jump onto the top of the aforementioned, vertical pole. Jump to the two ledges on the jutting block of stone, shimmy to the left, and backwards jump onto the ledge leading outside.
TEMPLE ROOFTOP - 1 Small Medipack
You'll find Lara standing on the temple rooftops which overlook the Lost Valley. Take in the scenery for a moment, and then turn right and continue along the ledges. First, grab the SMALL MEDIPACK nearby, and then climb to the top, rooftop platform, and continue along. Jump across the gaps to the further platforms, until you come to the final platform that is raised a bit higher than a lower, wooden platform with a wooden, vertical spoke. Jump onto the spoke and jump to the stone passage in the side of the rock wall, to your right.
HIGH WOODEN WALKWAYS
Jump to the ledge on the green, mossy wall, and then to the ledge on your left. Shimmy around the corner, and backwards jump to the high, wooden walkway. I wonder, what did the Peruvians do with such high platforms, in the first place? Walk along the platforms, and slide down the slope, jumping to the vertical, wooden spoke on the lower platform. From here, you can safely drop to the ground where you fought the raptors earlier, and then return to the wooden platforms to make it out of the Lost Valley
LOST VALLEY FLOOR (SECOND TIME THROUGH) - 2 Small Medipacks/ 1 Large Medipack
Grab the SMALL MEDIPACK on the wooden platform that will take you back into the stone hallway with the nest. Pick up a SMALL MEDIPACK between the two rocks nears two waterfalls, the 50 CALIBER AMMO near the single waterfall that falls between three skinny trees, and the MEDIPACK in the alcove on the left side of the Lost Valley entrance (when Lara's back is facing the entrance). Once you've finished collecting all of the medical supplies, locate the rectangular, stone block, jump to the wooden platform, and enter the stone hallway again. If you dropped to the ground from the platform with the vertical pole, then continue left down the stone hallway to pick up the small medipack in the nest.
RUINS W/ STONE HALLWAY AND MOSSY ROOM - 1 Small Medipack
Jump over the broken wall into a stone hall. Grab the SMALL MEDIPACK from the nest nearby, and proceed into the mossy room. The hall between the nest room and the mossy room contains a passage that will take you to the initial ground floor of the valley. We'll come back to that later. Vault up the ledges, and walk along the suspended bridge. Jump to the opposite side of the bridge.
OTHER SIDE OF THE BROKEN BRIDGE - 1 Large Medipack/ 1 Artifact
On the other side of the broken bridge, pick up the LARGE MEDIPACK from the ruined, stony place.After you've picked up the medipack, locate the ledge on the wall on the left side of the platform on this side of the bridge. Traverse the ledges until you climb up to the top of the thin, stone wall. The camera will point down to a slope that will take you closer to the exit of the Lost Valley, but an artifact is hidden on the other side. Jump across the slope, landing on the octagonal, stone pillar. Drop down the ledges and pick up the second ARTIFACT.
Climb over the ledge in front of you, and backtrack to the top of the thin wall. Jump onto the first slope, which is a fallen, square pillar. Jump to the second, square pillar, and consecutively to the horizontal pole mounted from a spoke on the rocky wall to your right. Swing across two poles, and jump across two high, wooden platforms which lead into another mossy tunnel. You've now left the Lost Valley. At least there aren't an raptors to say goodbye!
RETURNING TO THE WATERFALL CHAMBER - 1 Small Medipack
Traverse the mossy tunnels to the small chamber with the high slope. Slide down the slope, jumping to the ledge on the opposite, stone wall. Shimmy to the far right of the ledge, and drop to the ledge below, making sure to use your saving grab, if necessary. Drop to the platform on your right, passing back through the entrance to the ruined hall with ledges, where the bats attacked you. Backtrack to chamber with the slopes. You'll have to traverse the ledges to the other side of the hall to do so.
Once you come to the chamber with the slopes, jump to the nearest slope, slide to the ending ledge, jump to the ledge in the wall. Vault up to the higher ledge, shimmy to the left, drop down onto the second slope, and at the end of the slide, jump to the ledge on the opposite wall. Vault up the ledges to continue.
You'll come back to the room with the two vertical poles. Climb the taller pole, and jump from there to the top of the smaller pole. Alternatively, you can jump to the slope on the wall, and then to the smaller pole. Jump into the hole in the wall. On the left, drop to the ground and pick up the SMALL MEDIPACK. Climb back up the ledges and drop to the floor of the chamber where the bear attacked you. Backtrack to the main, waterfall chamber.
WATERFALL CHAMBER (TO PLACE THIRD GEAR)
Climb up the scaffolds, backtracking to the platform where you put in the second gear. Vault up the ledges on the left side of the platform to the wooden platform that hangs above. A wooden board rotates on a gear. You have two chances per revolution to jump onto the rotating board, and stick the landing onto the other side, on the ledge with third gear peg and switch. Place the gear, and pull the final switch.
RELIC CHALLENGE
After pulling the final switch, a scene showed a great, stone barrier descending to block off the flow of water atop the waterfall. The current that pulls one towards the end has stopped, and now the entrance to the secret place with the gear is accessible. Climb atop the waterfall, one final time, and jump into the river. Considering Lara's back is facing the edge of the waterfall, swim on the right side of the river, looking for a submerged, rocky overhang. Swim under the overhang, and ascend into the small cave where sits the KERO MUG, this level's artifact. Once you've picked this up, drop down into the waterfall pool, and pass through the tunnel, now accessible through the blocked-off flow of water.
Optional Secret: Throw your grapple at the revealed ring, and slide down to the farthest point you can, swinging, and jumping towards the small hole in the rocks to the right of the fallen bridge. Lara will crouch automatically. Follow the tunnel to a hole behind the waterfall where you can pick up one LARGE MEDIPACK and the SHOTGUN. Yeah! Now you can really shoot things! If you decided to collect the Optional Secret, you will have to fall into the river before returning back to the platform where you just picked up the second cog. If you do, you will have to fight three wolves that attack, even more savage than the first group!
Back on the platform where you collected the second cog, grab the pole fixed into the spinning cog. Swing to the small support beam on the waterfall. Shimmy and vault to the highest ledge, and then perform a backwards jump to the ledge revealing a tunnel. Pull the switch at the end of the tunnel which will open the gate to the relic later on. See the 'Relic Challenge' section to hunt it down. Dropping into the river is now the easiest way to proceed through the level, instead of climbing the ledges down to the bottom.
UNDERGROUND WATERFALL (AFTER YOU'VE COLLECTED THE 2 COGS)
Once you've made it back down into the initial waterfall chamber, jump out of the water and defeat the two wolves that attack from nearby. Locate the ladder that scales up to the high, wooden platforms.
First, place a cog on the peg that protrudes from the wall on the right side of the switch. Pull the switch, and a sequence shows the peg moving the gear up to meet the other gears, activating the next few gears. A horizontal pole, stuck into the face of one of the now-active gears, swings above you. Grab it, and at the right time, swing to the pole on the larger gear, and consecutively, to the ladder leading up to the next platform.
Again, stick the cog into the peg, and pull the switch. A sequence shows the next few gears activating. Traverse the ledges on the right side of the switch, and perform a backwards jump onto another wooden platform. From this platform, you'll first notice the wooden board that spins on the nearby gear. This will take you to the final switch and peg, but since we don't have any pegs, we'll have to find the one hidden in the lost valley.
Make the jump to the ledge on the rocky wall. Shimmy to the right, vault up, and go as far to the right as you can. Now do a backwards jump to the rope dangling behind you. Slide as far down the rope as you can, and then swing to the ledge on the stone wall to the right of the ledges you just climbed. Shimmy around the corner, and jump to grab the wooden beam above the noticeable, tunnel entrance. Dropping onto the platform will force the ladder nearby to fall over. The boards will break off, but a horizontal pole will now allow you a shortcut so you don't have to climb up the wooden platforms all over again.
TUNNELS W/ BEAR, SLOPE, AND HIGH LEDGES - 50 Caliber Ammo/ 1 Artifact
Vault onto the rock wall, and pull yourself up. Lara will automatically crouch. Drop to the other side of the small crawlspace, and proceed through the tunnel. Once you come to the second crawlspace (the first being the one you entered the tunnel through), be prepared to kill one of those nasty bears. They may be able to climb trees, but there are no trees here! If you run and climb onto the wooden platform as soon as you enter the cave with the ledges and wooden platforms, the bear will come after you, but not be able to reach you. Choose a good vantage point from which to shoot the beast...or just take him head on! Once he's down, climb the ledges to the highest, wooden platform and pick up the 50 CALIBER AMMO.
An artifact is hidden nearby. Facing the wooden slope across the gap, from where you picked up the ammunition, face the long, narrow slope on the left, considerably lower than you. Jump straight forward, perpendicular to the platform's left edge, and almost as soon as you hit the slope, jump and grab the edge on the tall, stone and wooden structure you were just atop. Shimmy around the corner, and backwards jump into the hole in the wall containing the first ARTIFACT in the level.
Once you've collected the artifact, backtrack to the platform with the pistol ammunition. Jump to the vertical pole, and position Lara so she can jump backwards onto the stone ledge behind her. Once she's caught the ledge, shimmy to the right, and vault to the higher ledge. Now jump backwards onto the same, vertical pole. Chimney-jump to the next pole, and then to the opening into the next chamber. Slide down the slope, and proceed through the tunnels, ignoring the wooden poles, for now, and into the next chamber.
CHAMBER W/ SLOPING SURFACES AND DEADLY PIT - 2 Shotgun Ammos
In the next chamber, pick up the SHOTGUN AMMO at the top of short set of stairs. Walk onto the wooden ledge opening to the pit with the sloped surfaces and deep pit. Take a running jump to the first slope, and at the base of the surface, jump to the ledge on the opposite wall. Jump to the right onto the platform with the SHOTGUN AMMO. Jump to the horizontal pole, swing to the ledge, and vault up the ledges to the above platform.
RUINED HALL W/ LEDGES, BATS, AND STONE PLATFORM - 1 Large Medipack
In the next hall with the beckoning, deep pit, jump to the ledge on the nearby wall. Shimmy to the far left until Lara can support her feet to perform a backwards jump. Once you grab the opposite ledge, shimmy to the platform and pick up the LARGE MEDIPACK. Watch out for the incoming, two bats. Continue to the small hole in the wall, climb in so that Lara is in a crouching position, and begin traversing the mossy tunnel. You'll notice the transformation from decrepit ruins to prehistoric tunnel. You'll come to a narrow section of the tunnel, now, with wooden planks covering a hidden slope. Take the plunge through the wooden boards onto the mossy slope, and enter the Lost Valley.
LOST VALLEY FLOOR AND INTERACTIVE CUTSCENE
Welcome to the Lost Valley. Your welcoming committee? Three velociraptors will attack you from nearby, not giving you a chance to take in the breathtaking scenery. Once you dispatch these three, which is easier with the shotgun, three more will attack. Once all six raptors are down, an interactive cutscene ensues in which a group of raptors run in terror from a tyrannosaurus. The old T-Rex is back, and nastier than ever. Good thing we can't smell his breath from our monitors and television screens! First you'll have to press the dodge roll button, followed by the shooting button, followed by the jump button. Once you've survived the interactive cutscene, you begin the Peru Boss Battle!
T-REX BOSS BATTLE
Congratulations, your presence in the Lost Valley has just "ticked" off the T-Rex. Read the bullets below to fight His prehistoric ugliness.
- I suggest using the pistols for this fight. This will conserve your shotgun ammo, and the rate of fire for the pistols is the desired necessity, right now.
- There are four, tall structures with spikes protruding from their cylindrical mass. Utilize these as necessary, for they will take out more of Ugly's health.
- To take out the T-Rex, you'll want to fire at him until his rage meter is maxed out. There are two meters in the top, right section of the screen. The top bar is his health meter, and the bottom bar is his rage meter. Firing repeatedly at the beast will increase his rage meter.
- Once his rage meter is full, the T-Rex will stop, and you'll see sound waves coming from his mouth. These signifies that you'll soon need to perform an adrenaline dodge.
- Performing the adrenaline dodge will take out only a little of his health, remember to utilize the spiky structures, as these will take out between a third and a fourth of his health each time.
- I suggest shooting until his rage meter is full, and then baiting him into the spiky structures, but once he's hit the structure, get as far back as possible. Further, it's best to run to the opposite side of the playing field each time you successfully perform an adrenaline dodge. If you shoot him, and spend too much time around his temporarily-disoriented ugliness, he'll swat at you with his tail.
- While running from him, be sure to keep a good distance from him as he can still attack with his tail and his sharp, un-brushed jaws.
- Once you've depleted his health bar (the top one) the entire way, another interactive cutscene will have you lure the T-Rex into the temple by rolling out of the way, and then shooting him in his eye. This will send him billowing into the pillar of the nearby temple structure. Ten years later, and he still goes down hard.
LOST VALLEY TEMPLE - (2) 50 Caliber Ammo/ 1 Small Medipack/ 1 Cog
There are a lot of items for Lara to pick up around the area, so before entering the temple, first pick up the 50 CALIBER AMMO near the little cliff that Lara cannot climb, from which she jumped in. Pick up another 50 CALIBER AMMO in the bushes near the right side of the little cliff (when Lara is facing the cliff). Now pick up the SMALL MEDIPACK by the T-Rex's left foot.
To climb into the temple, jump on the slanted blocks by the T-Rex's right foot, and jump onto the stone porch of the temple. Enter the temple, and pick up the third and final COG on the platform in the center of the pool of water. Now jump into the water and enter the tunnel on the right side of the chamber (when Lara's back is facing the temple entrance. At the end of the submerged tunnel. turn right and ascend to the surface.
TALL ROOM W/ POLE AND LEDGES
Climb onto the stone floor, and then jump onto the pole. Climb to the top of the vertical pole, and jump onto the semicircle platform. Vault up the ledges nearby, shimmy and jump to the left, and then perform a backwards jump onto the top of the aforementioned, vertical pole. Jump to the two ledges on the jutting block of stone, shimmy to the left, and backwards jump onto the ledge leading outside.
TEMPLE ROOFTOP - 1 Small Medipack
You'll find Lara standing on the temple rooftops which overlook the Lost Valley. Take in the scenery for a moment, and then turn right and continue along the ledges. First, grab the SMALL MEDIPACK nearby, and then climb to the top, rooftop platform, and continue along. Jump across the gaps to the further platforms, until you come to the final platform that is raised a bit higher than a lower, wooden platform with a wooden, vertical spoke. Jump onto the spoke and jump to the stone passage in the side of the rock wall, to your right.
HIGH WOODEN WALKWAYS
Jump to the ledge on the green, mossy wall, and then to the ledge on your left. Shimmy around the corner, and backwards jump to the high, wooden walkway. I wonder, what did the Peruvians do with such high platforms, in the first place? Walk along the platforms, and slide down the slope, jumping to the vertical, wooden spoke on the lower platform. From here, you can safely drop to the ground where you fought the raptors earlier, and then return to the wooden platforms to make it out of the Lost Valley
LOST VALLEY FLOOR (SECOND TIME THROUGH) - 2 Small Medipacks/ 1 Large Medipack
Grab the SMALL MEDIPACK on the wooden platform that will take you back into the stone hallway with the nest. Pick up a SMALL MEDIPACK between the two rocks nears two waterfalls, the 50 CALIBER AMMO near the single waterfall that falls between three skinny trees, and the MEDIPACK in the alcove on the left side of the Lost Valley entrance (when Lara's back is facing the entrance). Once you've finished collecting all of the medical supplies, locate the rectangular, stone block, jump to the wooden platform, and enter the stone hallway again. If you dropped to the ground from the platform with the vertical pole, then continue left down the stone hallway to pick up the small medipack in the nest.
RUINS W/ STONE HALLWAY AND MOSSY ROOM - 1 Small Medipack
Jump over the broken wall into a stone hall. Grab the SMALL MEDIPACK from the nest nearby, and proceed into the mossy room. The hall between the nest room and the mossy room contains a passage that will take you to the initial ground floor of the valley. We'll come back to that later. Vault up the ledges, and walk along the suspended bridge. Jump to the opposite side of the bridge.
OTHER SIDE OF THE BROKEN BRIDGE - 1 Large Medipack/ 1 Artifact
On the other side of the broken bridge, pick up the LARGE MEDIPACK from the ruined, stony place.After you've picked up the medipack, locate the ledge on the wall on the left side of the platform on this side of the bridge. Traverse the ledges until you climb up to the top of the thin, stone wall. The camera will point down to a slope that will take you closer to the exit of the Lost Valley, but an artifact is hidden on the other side. Jump across the slope, landing on the octagonal, stone pillar. Drop down the ledges and pick up the second ARTIFACT.
Climb over the ledge in front of you, and backtrack to the top of the thin wall. Jump onto the first slope, which is a fallen, square pillar. Jump to the second, square pillar, and consecutively to the horizontal pole mounted from a spoke on the rocky wall to your right. Swing across two poles, and jump across two high, wooden platforms which lead into another mossy tunnel. You've now left the Lost Valley. At least there aren't an raptors to say goodbye!
RETURNING TO THE WATERFALL CHAMBER - 1 Small Medipack
Traverse the mossy tunnels to the small chamber with the high slope. Slide down the slope, jumping to the ledge on the opposite, stone wall. Shimmy to the far right of the ledge, and drop to the ledge below, making sure to use your saving grab, if necessary. Drop to the platform on your right, passing back through the entrance to the ruined hall with ledges, where the bats attacked you. Backtrack to chamber with the slopes. You'll have to traverse the ledges to the other side of the hall to do so.
Once you come to the chamber with the slopes, jump to the nearest slope, slide to the ending ledge, jump to the ledge in the wall. Vault up to the higher ledge, shimmy to the left, drop down onto the second slope, and at the end of the slide, jump to the ledge on the opposite wall. Vault up the ledges to continue.
You'll come back to the room with the two vertical poles. Climb the taller pole, and jump from there to the top of the smaller pole. Alternatively, you can jump to the slope on the wall, and then to the smaller pole. Jump into the hole in the wall. On the left, drop to the ground and pick up the SMALL MEDIPACK. Climb back up the ledges and drop to the floor of the chamber where the bear attacked you. Backtrack to the main, waterfall chamber.
WATERFALL CHAMBER (TO PLACE THIRD GEAR)
Climb up the scaffolds, backtracking to the platform where you put in the second gear. Vault up the ledges on the left side of the platform to the wooden platform that hangs above. A wooden board rotates on a gear. You have two chances per revolution to jump onto the rotating board, and stick the landing onto the other side, on the ledge with third gear peg and switch. Place the gear, and pull the final switch.
RELIC CHALLENGE
After pulling the final switch, a scene showed a great, stone barrier descending to block off the flow of water atop the waterfall. The current that pulls one towards the end has stopped, and now the entrance to the secret place with the gear is accessible. Climb atop the waterfall, one final time, and jump into the river. Considering Lara's back is facing the edge of the waterfall, swim on the right side of the river, looking for a submerged, rocky overhang. Swim under the overhang, and ascend into the small cave where sits the KERO MUG, this level's artifact. Once you've picked this up, drop down into the waterfall pool, and pass through the tunnel, now accessible through the blocked-off flow of water.
Last Level: City of Vilcabamba Next Level: Tomb of Qualopec
