Level 4 - Tomb of Qualopec
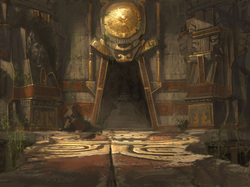
Having revealed the secret tunnel faceted into the blind spot behind the waterfall, Lara enters the Tomb of Qualopec, said to be the resting place of one of the three Atlantean gods, and also a piece of the Scion, an artifact containing a vast library of knowledge, and an unlimited source of energy. But traps separate Lara from her prize, which will once again put Lara's acrobatic prowess to the test.
Level Objective: Find and activate the three switches that will open the path to Qualopec's tomb, and a piece of the Scion.
Artifacts: 2
Relics: 0
Level Objective: Find and activate the three switches that will open the path to Qualopec's tomb, and a piece of the Scion.
Artifacts: 2
Relics: 0
TUNNELS TO ANNEX CHAMBER
Follow the rocky tunnel out to a long hall with a ruined hall with wooden poles jutting up from the revealed ground. Jump to the first pole, and then to the horizontal pole constructed into the wall, followed by a swing to the next pole. From this pole, jump to the higher pole on your left, which may seem improbable, but will get you where you need to go. From here, jump to the piece of floor that remains in the corner, and jump into the next hallway on the opposite wall.
ANNEX CHAMBER (First Switch) - (1) 50 Caliber Ammo
You will come into a large annex chamber, which empties into three halls, one which is directly opposite of the entrance. As soon as you touch the slope up into the hall to Qualopec's tomb, a trigger activates a boulder that will billow towards you. Take cover outside the hall's entrance as the boulder tumbles by, breaking a remnant of the chamber floor. Once this is a broken, a wooden support column is visible in the pit beneath the floor remnants. There is a second one in the pit, but it isn't yet accessible. To open the gates that shut off the sloped hall to Qualopec's tomb can be opened by finding three switches scattered around the ruins. The first one is in the annex chamber.
Drop into the pit, safety dropping from on top of the support column. Pick up the 50 CALIBER AMMO, and then return to the column. As if Lara's back is facing the entrance to the annex chamber, pull the support column to the left, so that it rests between the two light patches of dirt nearby. To return to the surface, pull the broken-off base of a support column to the nearby corner where hangs several ledges. Climb up these three ledges to return to the surface.
Back on the ruined floor, jump to the top of the support column you just moved, and grab the ledge on the edge of the floor. Above this ledge is a ledge that spans around a short corner. Shimmy around, and vault up to the higher ledge. Shimmy to the right, and when prompted, jump to the right, grabbing the ledge that protrudes from the ruined statue. Find some footing, and then vault to the top of the crumbled statue.Take a running jump to the yellow and brown pole on the side of the entrance to the sloped hall. Jump to the top of the entrance.
To find the switch, and access the two side hallways, use either the automatic aim feature of your pistols, or the manual aim (my personal favorite) to shoot down the suspended gong that looms over the floor remnants. Shooting this down will break the floor, making the second support column available. Now, to get the switch, you'll need to reach the hollow in the wall on the opposite side of the room by using your grappling hook to swing from the first rung faceted into the ceiling, to the second rung, and finally to the hollow. Once inside, use the Interact button to open the first gate. One down, three to go!
To reach the ground, throw your grappling hook, lower yourself as far as you can, and then swing to either the annex chamber entrance or the central chunk of ruined flooring. Now we can access both side hallways, but for time's sake, we're going to start with the one closest to the first support column that you moved. Backtrack to the ledge that spans the corner, and once you've shimmied around, and far to the left, jump to the left, landing on the ledge with the entrance to the first side hallway.
RUINED HALLWAY TO RUINED CHAMBER (Second Switch) - 1 Shotgun Ammo/ 2 Small Medipacks/ (1) 50 Caliber Ammo
Follow the hall down to a drop off where darts fire across the opening the the hall with the ruined floor. Pick up the SHOTGUN AMMO on the ground, and then jump the horizontal pole, timing your jump so you miss the shooting darts. Swing to the ledge, jump to the ledge on the left, jump to the left over the reception holes for a shooting dart trap. Most likely, the ones on the wall won't hit you, but the ones that cover the entrance and exit to the ruined halls will, so be careful! Jump over a second set of reception holes, and perform a backwards jump onto a ruined ladder. Climb up the ladder, and jump to the ledge on the right, bypassing a dart trap. Jump to the final ledge on the right, and then perform a backwards jump to a pole protruding from the ground.
Jump into the adjacent hallway, picking up the two nearby SMALL MEDIPACKS. Role through the hall with the dart traps, and a second hall of dart traps, which empties into a ruined chamber with muddled debris lying about. Throw your grappling hook and swing to the crumbled stairs. At the top of the steps, turn to your right and jump to the vertical pole. Jump to the horizontal pole faceted into the wall behind you. Swing to the ledge, vault up to the higher ledge, and climb atop the wooden walk space, high above the room. Pick up the 50 CALIBER AMMO. Jump to the ledge above the second switch, and then drop to the switch, which will fall under your weight. This opens the third gate blocking off Qualopec's tomb.
Drop to the ground, and backtrack to the hall with the shooting darts. Before, only some of the dart traps were activated, but they are all on, and menacing, now. Dodge roll past them, timing when needed. In the first hall with the dart traps, two rapidly swinging pendulums (of death...) are now in motion. Don't worry about the darts as much as the pendulums. As soon as the pendulum swings past, roll across the "line of fire". Do the same for the second set of darts and pendulum.
As soon as you begin to exit the room, a Velociraptor makes its appearance in the hall. Unload your weapons into him, performing an adrenaline shot if necessary. Backtrack to the Annex Chamber.
ANNEX CHAMBER (Returning to Access the Second Hallway)
Once you've returned the Annex Chamber, drop to the ground and pull the two support columns onto the opposite side of the pit. Position one so that it is tight up against the slope, somewhere around its midpoint, and the second so that it rests on the dark patch of ground between the two lights patches, roughly halfway between the remaining floor and the first column. Surface, jump across the pillars and enter the second branching hallway.
RUINED HALLWAY TO CHAMBER W/ WOLVES - 1 Artifact/
Traverse the hallway, and once you reach the section that drops off, with dart traps and vertical poles coming up from the ground, hang on the ledge that drops into the dark, narrow pit. One of the artifacts is hidden at the bottom, at the end of the pit, hidden behind some rocks. Snag it before you return to this hallway, because the next time you do, a Velociraptor will be waiting for you. Once you've grabbed it, climb up the vertical pole near the two ledges you safety dropped down from, climb up, and return to the ground level again.
Jump atop the first vertical pole, jump to the ledge on the left side of the room, jump to the ledge on the right, dropping to the ledge below. Shimmy to the right, and perform a backwards jump onto the vertical pole, entering the next length of hallway.
CHAMBER W/ WOLVES (Third Switch) - 1 Artifact/ 1 Shotgun Ammo
The hall will empty into a chamber with a switch built into the side. Upon approaching the switch, the floor will collapse, and you will immediately be thrust into a battle with two wolves. Once they are dispatched, ascend the sloped walkway to the middle platform against the back wall. Pull the cage out of the alcove in the wall, and tip it over the side of the walkway. There are two pillars on the ground. Push the cage up against the side of the pillar with the small ledge on its face. From the small ledge, vault up to a second ledge and then backwards jump onto a horizontal pole that is hung from the ceiling. Players have experienced a bug here which causes Lara to pass straight through the second pole once she jumps from the first. To avoid this, turn Lara a bit to the side, and then jump to the second pole.
From the second, hung pole, jump to the ledge on the second pillar. Shimmy around a corner, and backwards jump to the horizontal pole, swinging consecutively to the mounted, stone platform just under the switch. Climb up two ledges, shimmying to the far right on the second. Jump backwards to the vertical pole. Instead of jumping, next, to the switch, climb to the top of the pole, and jump to the small space in the wall, on the left side of the chamber as if entering. You will have to turn your camera to see it. Once inside, grab the ARTIFACT, and then jump back out to the vertical pole. Jump to the ledge above the switch, and then drop down onto the switch, which will open the third, and final gate.
Use the horizontal pole on your right to swing to the ledge in the wall. Vault up the ledges into a small space similar to the one with the artifact, and then make an angled jump out towards the half of the floor that didn't collapse beneath your feet. Backtrack to the annex chamber, dispatching the Velociraptor that attacks you as you exit the chamber with the third switch. The pit with the first artifact now has a magical Velociraptor in it.
HALL TO QUALOPEC'S TOMB AND ESCAPING THE TOMB
Once you've pulled all three switches, and opened their respective gates, the path to Qualopec and his piece of the Scion is clear. Take the slope up the hallway that empties into the much-anticipated Tomb of Qualopec. A cutscene ensues. Lara is examining the Scion, and then directs her attention to a seemingly harmless shell of Qualopec sitting in a throne guarded by two Atlantean mummies. One comes alive, threatens Lara with an intimidating roar, and then collapses to the ground. Lara then takes the Scion, causing the tomb to begin to shake violently. As the tomb is blocked off by fallen debris, Lara glimpses Qualopec rising from his slumber. When you regain control of Lara, make your way back towards the waterfall from the previous level. You can take your time, as the environment is no threat to your health. A Velociraptor now inhabits the crumbled hallways just outside the tomb. You can face it, and cross the pit from the bottom, or avoid it and use your acrobatics to traverse the pit again.
Once you leave, a cutscene shows Lara narrowly escaping the tomb, via a refreshing dive into the pool of water beneath the fall. She glimpses Larson above the surface, and then goes up to greet him. Larson reveals that he's here to collect the artifact form Lara, but she won't allow him due to her personal needs for the Scion. Lara retaliates in an interactive cutscene.
INTERACTIVE CUTSCENE
Larson and Lara go at it for the Scion piece. First, press the jump button to avoid his lunging body. Press the roll button to avoid the dirt he throws to disorient you. Finally, press the interact button to attack him before he hits you with his shotgun. Once you've finished this, another cutscene shows Lara on top of Larson, interrogating him about the whereabouts of the other pieces of the Scion. Once she's gathered all her information, she heads away, as if to leave, Larson tries to shoot her in the back, but she kicks him across the face, and picks up his shotgun. If you did not get the shotgun in The Lost Valley, you'll obtain it now.
One last cutscene shows Lara flying up an elevator cord to the roof of Natla Technologies. She infiltrates Natla's rooftop office and sorts through her files to see what Larson and Pierre were up to. Pierre seems to have found the location of the second Scion piece in a place called St. Francis Folly.
Last Level: The Lost Valley Next Level: St. Francis Folly
