LEVEL 5- Kazakhstan
Amanda Evert broke into Croft Manor and discovered that the next piece of Excalibur lay buried in the ruins of a secret Soviet laboratory, hidden deep within the snowy caps of Kazakhstan. Lara heads straight there to recover the fragment before Amanda can.
Level Objective: Discover the entrance to the secret Soviet laboratory, and beat Amanda Evert to the next sword fragment.
Rewards: 5 Bronze/ 3 Silver/ 1 Gold
Level Objective: Discover the entrance to the secret Soviet laboratory, and beat Amanda Evert to the next sword fragment.
Rewards: 5 Bronze/ 3 Silver/ 1 Gold
WALKTHROUGH:
MOUNTAIN TOP
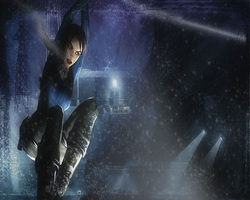
A short cutscene shows Lara sliding down a mountainside, gazing down at the Soviet complex where the Kazakhs are battling it out with Rutland's mercenaries. Zip warns Lara not to go down, but Lara suggests that waiting is for people who don't have parachutes. The top of the mountain is scarce of anything significant, so approach the torn-open gate and jump out. Lara has a parachute, and when prompted, press your environmental hazard button to open the parachute and land expertly atop one of the complex buildings...right next to a turret.
SOVIET BASE (PART 1) W/ ACCESSIBLE BUILDING AND TRUCK OUTSIDE- 2 Bronze Rewards
The easiest way to go about defeating the slew of mercenaries lurking about is to operate the turret you landed near. Press the interact button to go into the aiming mode of the turret, and fire strategically at one of the oil drums to begin the battle. Mercenaries will fire form the two windows into the building, and some might take cover behind the truck. There are about ten mercenaries, many of which can be dispatched by hitting the oil drums near them. Watch out for the ones shooting from the windows! Once you've dispatched them, turn right along the rooftop to go for a reward. Climb onto the higher roof with two stacked boxes. Walk to the edge facing the horizontal flagpole, and jump to the connected bar, swinging across to the smaller building's rooftop. You may encounter about four more mercenaries upon accessing this rooftop. Inside the crate nearby is a BRONZE REWARD. Claim it and then jump to the ground, picking up any of the necessary ammunition scattered around the snowy area. Walk into the building where the mercenaries shot at you from the windows, and locate the back room. Inside the small storage room, on the bottom of one of the shelves is a BRONZE REWARD. You can claim it with your grapple or by taking it manually. Back inside the building's main room, take the ladder positioned in the center up to the rooftop. You'll now be standing in front of two spherical ventilation devices. Walk around them and shoot the mercenary in the watchtower on the other side of the ventilation devices. From here, jump onto the open, glass sunroof and jump to the watchtower.
SOVIET BASE (PART 2) W/ THREE WATCHTOWERS AND COMMAND CENTER GATE- 1 Silver Reward
From the watchtower, you can zipline to the ground or take the wooden plank slide onto the rooftop below. Watch out for the man in the turret. I counted five mercenaries on the ground. Taking them out from the rooftop worked best for me. Take a moment to gather ammunition. First, we'll hunt down a reward. The only other building besides the one with the rooftop you could previously access has a door which you can enter to continue the story. Facing the door, though, approach the watchtower on the left. Between the aforementioned building and the watchtower are two large crates that line the fence around the watchtower. Between them are stacked boxes. Fire through the boxes, or throw a grenade, then enter inside the fenced in area. Near the oil drum inside is a crate containing a SILVER REWARD. Collect it, then stand back and shoot the oil drum. This will cause the nearby fence to explode, and give you easier exit out. Proceed back to the building with the interactable door, and use your interact button to go inside where a cutscene will ensue. In the cutscene, Lara interrogates two Kazakhs about the location of the command center. After they tell her, you control her again. If you need to, pick up the Assault Rifle ammunition nearby on the ground, then proceed outside to the keypad on the left side of the gate.
HILL W/ ROLLING BARRELS AND COMMAND CENTER
About six mercenaries will bombard you as you approach the gate's keypad. Dispatch them, perhaps with the nearby turret, and then use the interact button on the keypad to the left of the gate. After a moment, the gate will open revealing a snowy hill with oil drums that roll down and then explode at the bottom. They'll begin falling as soon as the gate opens. To stop them, you'll need to fire at the oil drums when they are still atop the hill. Use the environmental hazards button to complete this. If you fire at the right time, the two mercenaries rolling the barrels down from the top will die. Pick up their equipment, then head inside the command center. Once inside, approach the central computer station to trigger a cutscene in which Lara finds the route to the secret Soviet laboratory.
RETURNING TO SOVIET BASE (PART 1)
Take the ladder to the left of the central computer station. Jump to the watchtower ladder, and then take the zip line at the top back down to Soviet Base Part 1, near the rooftop that you parachuted onto in the beginning. You'll land in the watchtower above the bronze reward inside the fenced-in perimeter. Another zip line will take you to the first rooftop you landed on in the level. From there, jump to the ground and dispatch the guards near the train gate. Ignore the guards up on the walkway, because the next part is a timed sequence. If you don't access the bike before the timer runs out, you'll have to begin at the previous checkpoint. Jump onto the Ducati and speed off down the tunnel towards the train.
MOTORCYCLE TRAIN CHASE
A new area will load, beginning a sequence much like Peru. You'll have to fight off mercenaries, and SUVs, to proceed to the new areas, following the train to the Soviet laboratory. Make use of the gasoline tanks spread across the snowy fields, watch out for large rocks and trees, and try avoiding running into the train. After you kill about ten mercenaries on bikes, Zip will tell you that he can't see what's going on. The train is beginning to head into a tunnel. Swerve to the far right of the path to continue around a snowy mountain side. You can take the left route, which is much safer, or the right route, which shows off Lara's biking prowess. Each side has a few health packs, so make your pick. After a few bends, a checkpoint will signal that you are about to head back towards the train. Veer to the left and back towards the train tracks path. At this point, I counted three biker mercenaries and one SUV. For the SUV, simply shoot at the man firing from the sunroof. Next come, in groups, more than ten mercenaries on bikes and around four or five SUVs. Take them out and, once you do, the train will vanish inside another tunnel. Swerve to the right side of the path again for another mountainous route. After a choice between left and right paths, you will jump a wooden ramp, over the train and onto a snowy path near some power towers. The path will turn right very soon and you will jump another ramp over the train. If you stay on your left, the path will go up a wave that looks like a frozen pipeline, and you can jump onto the train. Ride up the back of the train towards the front as far as you can. A cutscene will show Lara battling with the conductor, moments before the train crashes into a gasoline tank. A new area will load triggering an interactive cutscene.
INTERACTIVE CUTSCENE
You'll have to press three buttons. One to duck, your environmental hazards button, and finally the magnetic grapple button. The train will crash inside the entrance to the Soviet laboratory, and Lara will begin on a raised metal platform.
SOVIET LAB W/ TRAIN WRECK AND MOVABLE ROPES- 1 Bronze Reward
From where you begin on the raised platform, walk to the edge where the rope dangles ahead. Throw your grapple and pull the metal arm towards you, bringing the rope as well. Swing across to the raised platform with the ladder on the support beam. Climb up the ladder. Jump to the right onto the sign on the wall. Shimmy to the far left of the sign, and jump to the first of two horizontal poles. Swing from the first pole to the second, and from the second to the sign hanging on the wall. Safety drop to the ground. From the platform you dropped onto, face the side opposite the train wreck, and drop to the ground below where you can pick up a BRONZE REWARD hidden inside a crate. Jump back up onto the platform. Walk to the edge and throw your magnetic grapple at the second arm with a rope. Pull the rope towards you. Jump and grab the rope, try to climb higher on it as it swings you across the flaming wreckage. On the ground, find the movable box and move it to access the suspended platform above. From the suspended platform, use the environmental hazards button to destroy the fan blades in the vent on the nearby wall. Jump to the wall and grab the ledge. Vault up to the ledge with the vent. Enter the ventilation shaft.
VENTILATION SHAFTS- 1 Bronze Reward
Proceed through the shafts. Make a right, then a left, then slide down a slope with unstable cables laying at the bottom. Hold the jump button in to jump over the first set and avoid the unstable cables, then dodge roll underneath the second set of cables hanging from the ceiling. Walk over to the body trapped in the gate. Pick up the health pack and the journal entry explaining what happened to him. Turn left at the gate and jump to the horizontal pole inside the long vent with the pole and rope. From the pole, swing to the rope. Swing at maximum speed to the top of the next shaft. Be prepared to jump over some unstable cables while sliding down the nearby slope. At the bottom of the slope, turn right. When close to the hanging cables, use the environmental hazards button to shoot the nearby fan blades. Roll under the cables and turn left down the next shaft. Near the end of the shaft is a slope. Use the environmental hazards button to shoot the fan blades down at the bottom of the shaft. While sliding down, jump over the unstable cables laying in your path. Jump over the first set of cables and roll under the second set. Down the hall, turn right and proceed to the slope. Jump over the cords laying about halfway down. At the end of the slope, jump and grab the horizontal pole. Once on the pole, drop to the ground just beneath you. Break open the small crate a collect a BRONZE REWARD. On the other side of the space, jump onto the crate. From the crate jump back in the direction of the slope and throw your magnetic grapple. Turn around and face the hole above the crate. Swing at maximum speed and jump to the ledge. From the ledge, use the environmental hazards button to shoot out the fan blades at the bottom of the slope in front of you. Slide down into the generator room.
GENERATOR ROOM- 1 Silver Reward
From the bottom of the slope, turn right. On the same wall as the slope are two mounted boxes, one just above the other. Climb onto the first one and then vault up to the second. On the second box, shimmy around the corner to the left and vault onto the raised platform. Walk to the edge and throw your grapple at the door across the gap. Pull open the door. Jump into the small room on the elevated platform across the gap and collect the SILVER REWARD from inside the crate. On the left is an opening in the fencing. Drop down to the ground. Return to the bottom of the slope. On the left (when Lara's back is facing the slope wall) is an electrical box. Climb onto it. From here, jump to the mounted box on the wall, similar to the ones necessary to retrieve the silver reward. Shimmy, then jump to the left, and vault up onto the raised platform. Jump across the gap to the next raised platform, turn right, then follow the platform down to the cylindrical containment unit. A metal pipe at a forty-five degree angle has a rope attached. Jump to the rope. Pulling the rope down results in connecting the metal pipe at the angle to the main generator, and fuel comes out from the cylindrical containment unit. Jump to the ground, stand in front of the generator, throw your grapple, and pull to activate the generator. A sequence shows the power turning on. Approach the door which is around the catwalk with the silver reward.
HALLWAY WITH TOXIC GAS AND ELECTRIC-CHARGED PIPES
Jump to the raised platform on the right side of the hall. Jump to the horizontal pole and swing to the second, higher raised platform. Jump to the next pole and swing to the rope and, further, to the raised platform at the turn in the hallway. Jump to the smaller platform. Stand at the edge and reach up towards the higher platform. A pipe on the wall emits a charge of electricity that moves down to the end of the pipe and then begins again at the beginning, near you. Time the climb across, your best chance is staying right behind it. Once you are at the end of the pipe, perform a backwards jump onto a mounted vent on the opposite side of the hall. Shimmy around the vent to the right, drop to the ledge below, then backwards jump onto the next raised platform. You'll want to grab the pipe that spans over the toxic gas, and again, wait for the electric charge to pass before jumping on and following it to the other end of the pipe. Drop to the platform, then to the door below.
CENTRAL LAB WITH TESLA TOWER AND TESLA TURRET- 1 Bronze Reward/ 1 Silver Reward
Walking into the next room triggers a cutscene between Lara and Amanda. Amanda tells her mercenaries not to let Lara follow her, so they throw a grenade and blow up a bridge. The objective in the next few rooms is to power the Tesla tower, charging the Tesla turret, so you can pull the suspended bridge towards the blown bridge and bridge the gap. Slide down the blown bridge to the ground floor, and dispatch the three mercenaries. One has a shield, so throw a grenade to dispatch him. Approach the Tesla tower. On the right side of the tower, in a blind spot, is a BRONZE REWARD. Claim it then go to the left side of the tower. Grab the nearby pole with the ambient discharge elevating it. Stay just under the discharge as you climb up the vertical pole Jump from the pole to the quarter-circle platform on the tower. Vault up to the slightly higher platform, then jump to the horizontal pole that is above the quarter-circle platform. Swing to the second pole, and then to the rope suspended from the tower. Turn Lara so that she is facing another pole on the Tesla tower, and swing to it. There isn't a discharge on this one, so take a moment to break and examine the next two, powered poles.Wait for the discharge of the nearest pole to vanish from the top and begin again at the bottom, then jump onto it. From here, jump to the next pole when the charge is higher up. Jump from the pole to the platform surrounding the Tesla tower. You're only temporarily safe. Pick up the health pack and the journal entry from the next dead body. On the right side of the body is a suspended cage. Throw a grenade to blow up the cage door with help from the oil drum inside. Once the door is open, collect the SILVER REWARD inside. From here, follow the tracks the lead to the Tesla tower back through a door into another hallway.
HALLWAY W/ SWINGING ELECTRIC CABLES AND TOXIC GAS
Follow the hall right, then left to the part with the toxic gas. Climb onto the raised platform on the left side of the hall. Jump to the horizontal pole to the next platform, then jump from the platform to the hole above the door. Climb into the next room.
ROOM W/ DEBRIS AND TESLA TOWER CHARGER AND TRACKS
About four mercenaries roam this new room. Once you dispatch them, follow the tracks that lead into the room to the Tesla Tower Charger. You can identify this as a movable object with your binocular RAD mode. Or look for it by the large map similar to the other rooms mounted on the wall. Move the block as far as it will go, for now. Jump onto it, and then to the broken ladder next to the large map. Once you climb atop the platform at the top of the ladder, a cutscene ensues in which Amanda contacts Lara over Lara's private channel through a headset which she had stolen from Lara's mansion. From the platform, swing to the horizontal pole, and then to the next platform. Jump to the rope hanging out by the tracks. Swing fast and grab onto the upside down pylon. Shimmy to the left around two corners, then jump backwards to another horizontal bar. Swing to a broken platform, and then jump onto the ladder mounted on the wall next to it. The ladder will fall down, allowing easier access to your current location, in case you fall. Climb back up to the top of the ladder and jump to the right onto the next raised walkway. From the edge of this platform, use your environmental hazards button to shoot the oil drum inside the control station window. The window will shatter, and now you can jump onto the rope nearby and swing inside the control center. Pick up the health pack and another dead scientists' journal entry. Pull the lever, sadly one of the only ones in the game, over by the control center dashboard. A sequence will show you the charging block being zapped to life. You can now use it to remove the debris from the tracks. Walk out the door and climb down the ladder. Safety drop to the ground. Use your magnetic grapple to pull the charger into the debris. Continue this pattern, using your magnetic grapple to pull the block along the tracks, while avoiding the concussive blasts along the way. Once the block is near the door, it will begin to run manually, being fully charged. Exit the room and return to the hallway.
HALLWAY W/ SWINGING ELECTRICAL CABLES AND TOXIC GAS
Once in the hallway again, grab the platform on the right side of the hallway. Jump to the pole and swing to the next platform. Jump to the ground, and when you turn the corner, you'll find that those hanging electrical cords are now charged, an effect of the Tesla tower charger block. To pass through, take you grapple and pull the cords back. It will begin swinging. When it approaches the metal pipes on the side of the hall, it will emit an electrical charge. As it swings higher than the pipes, it will be safe to run through. But don't stop! Do this for the first two cords. When you turn in the hallway, you'll notice that the cords now come in twos. You'll have to pull one with the magnetic grapple, pull the other, and wait for both of them to be above the pipes before sprinting through. Do this for both sets of two cords. Enter back into the main chamber again.
CENTRAL LAB W/ TESLA TOWER AND TESLA TURRET -1 Gold Reward
Once inside the central lab again, the tower charger block will be waiting. Use your magnetic grapple to open the door on the face of the Tesla tower. The charger will slide in automatically, and the tower will now be powered up. On the right side of the tower (with Lara's back facing the entrance to the hallway with the swinging cords) there is a door leading into a room. The doors are on the fritz, though, so you'll have to time it right, rolling in. Once you are inside, approach the shield on the nearby table. A cutscene shows Lara examining the shield, and the map on the other side. Alister prepares to identify where the map leads. Pick up the nearby health pack and journal entry from the next frozen scientist on the ground. Leave the room through the second door, using the same strategy you did for the first door on the fritz. It's time to put the charged Tesla turret to use. Use the interact button to operate the turret, and use the instructed buttons to pull and throw nearby metal objects. Picking up oil drums will help defeat the shielded men on the other side of the blown bridge. Once the men are defeated, you can now focus on picking up the big reward.
GOLD REWARD CHALLENGE
On the wall to the right of the Tesla turret are four small boxes that line a ledge fixed into the wall. Pull them out. Now find the large crates scattered around the room, and stack two so that you can reach the now-empty ledge. Putting more than one large crate on the ground may help you get one of those devils on top of another. Finally, position the suspended platform as far right as it can go. Once you do, abandon the Tesla turret and climb up to the ledge using the boxes you stacked. Vault up to the rusted ledge above, and shimmy to the left, around the corner. On the far left of the ledge, drop onto a small platform. Jump to the larger platform that you moved there, suspended below, then from there the smaller platform just above it. Walk to the edge of the platform, jump and grab the horizontal pole and swing to the hollow with the GOLD REWARD. Now backtrack to the Tesla turret. Pull the suspended platform towards the gap in the railings and jump to the platform, and then the final platform on the other side of the blown bridge. Enter the next hallway.
HALLWAY W/ SLIDING PLATFORM AND TOXIC GAS AND BREAKABLE PIPES
Jump onto the platform in the hallway. This platform can slide by slowing your magnetic grapple. The two pipes that barricade your way can be broken up with your weapons. Destroy them, then throw your grapple at the fixtures on the wall, and pull yourself the length of the hallway. Around the corner, jump onto the next sliding platform. The blue rods are dangerous. You'll need to pull yourself, and then at the last moment possible, duck underneath the highest blue bar. Jump onto the next platform. Destroy the pipe, throw your grapple and pull yourself, except release the grapple and when you approach the blue bar, jump over this one. Turn right down the hallway and approach the final door in the Soviet lab.
TESLA TESTING CHAMBER W/ SWORD FRAGMENT
Enter the Project Carbonek testing chamber and a cutscene will ensue. Amanda is struggling to gain access to the sword fragment, and Lara is closer, so she summons the Unknown Entity to defeat Lara before she able to retrieve the sword fragment from the testing equipment. The goal of this boss battle is to activate Project Carbonek while ignoring the Unknown Entity. Activate the four switches on the walls, each equal distance from each other, to begin the experiment. Ignore the Entity while it tries to attack you. If you run, it won't be as likely to catch you. Once the four switches are pulled, use the interact button to jump into the central Tesla turret and shoot the four upside down pylons away from you. They will create a field around the artifact. The Entity will try to attack you while you are in the turret, but if he is successful, simply jump back in and keep going at it. Once the electric field has been completed, and all four pylons have been pushed far back, jump out of the Tesla turret and throw your grapple at the sword fragment, pulling it out, and triggering a cutscene in which Lara is escaping the Soviet laboratory while everything is exploding around her. As she's crawling out of a pipe, she is told through her headset that the next piece of the sword is hidden in Cornwall, England.
Previous Level: Level 4- Ghana Next Level: Level 6- England
